


Fitness Flohmarkt · Guide
Learn your first pull-up: hanging, pulling and progressing
You hang from the bar, pull and barely move? Your first pull-up needs an easier version of the same movement and progress you can track. Learn an overhand pull-up with a controlled setup, assistance and slow lowering, without a promise that it will happen within a fixed number of weeks.
In short
Start with enough assistance to control your grip, shoulders and trunk. Practise assisted pull-ups on two separate days each week, add a few slow lowering repetitions and reduce help only while keeping technique consistent. A band can help, but it is optional and does not replace a suitable setup.
First pull-up: start with a controlled setup
The bar must suit the load and be installed according to its manufacturer. Leave room for your head and legs and arrange a controlled way on and off. Use a suitable stable step if needed. A shaky chair, a jump to an overly high bar or an awkward band exit makes learning unnecessarily difficult.
Check installation and bar choice in the pull-up bar guideView the R-SERIES Power Rack for pull-ups and barbell training
First try the position with your feet supported. Wrap your thumbs around the bar. Allow controlled upward shoulder movement rather than forcing your shoulders down while hanging. Stop if there is pain; an online progression cannot assess individual limitations.
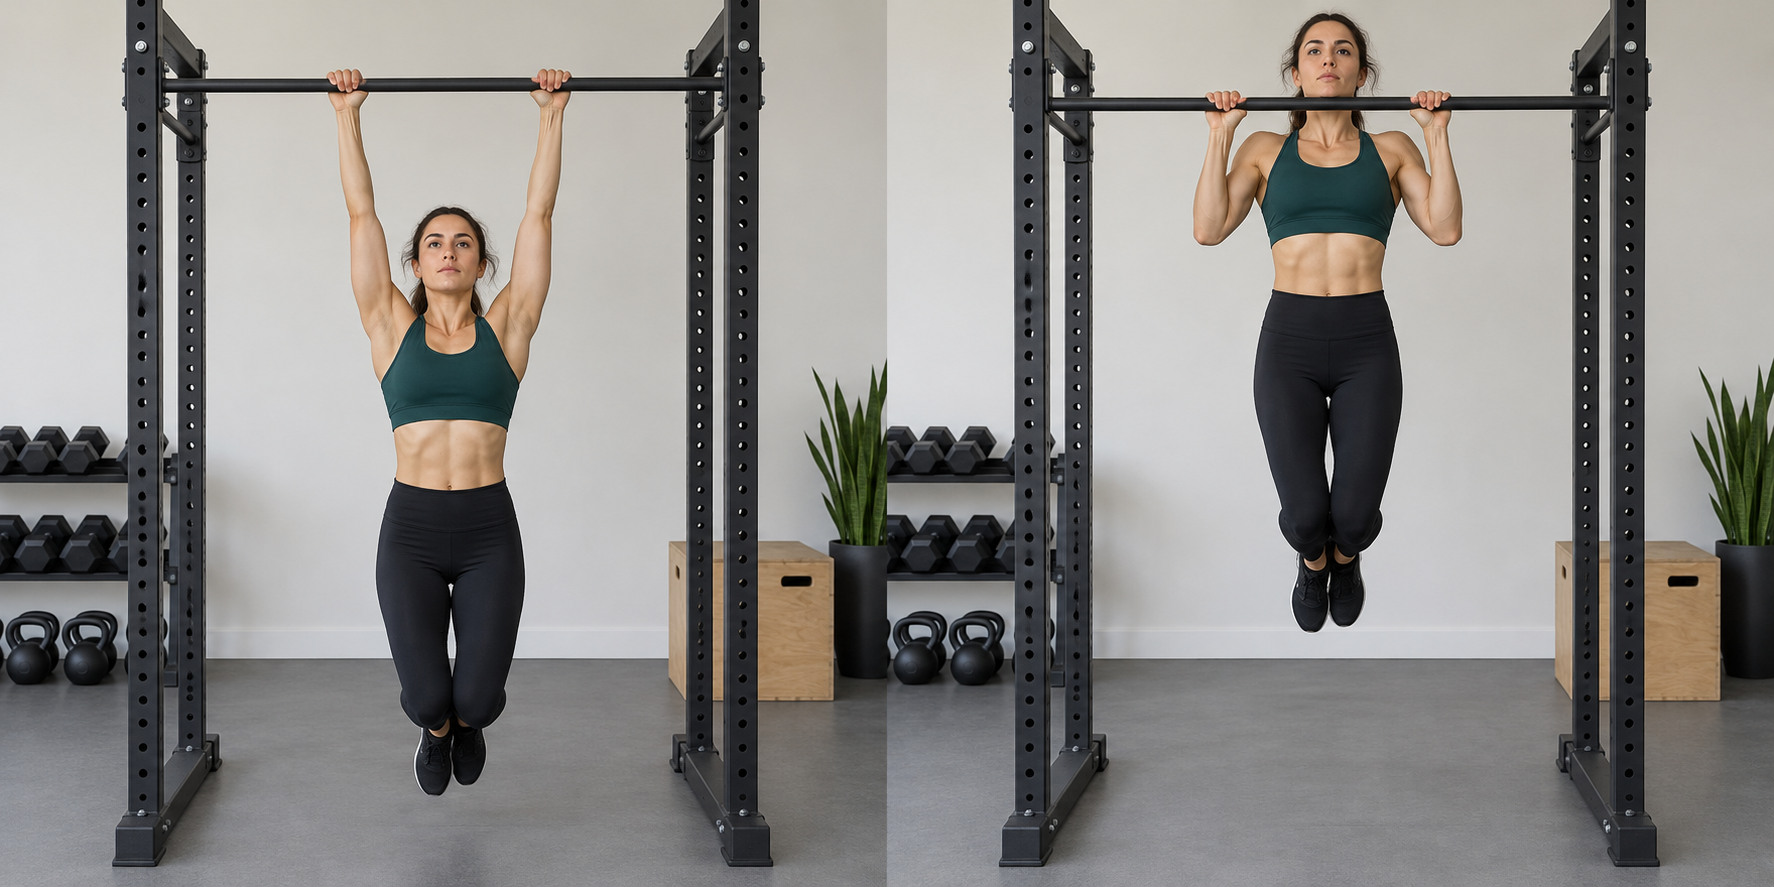
What a controlled overhand pull-up looks like
- Grip around shoulder width or slightly wider, palms facing away. Choose a width comfortable for wrists and shoulders.
- Brace your trunk without excessive arching or swinging. Slightly bend your knees if your feet would otherwise touch the floor.
- Drive your elbows down and lift your body towards the bar. Shoulders and elbows move together; you do not need to freeze an exaggerated shoulder-blade position.
- Bring your chin above the bar without craning your neck. Lower calmly to extended arms. If you cannot yet complete the range, add more assistance.
A progression over several weeks, based on ability
The following volumes are our adaptable starting suggestion for healthy adults, not a validated success programme. Start with two sessions separated by at least one rest day. Warm up your shoulders, arms and trunk, then begin with an easy assisted variation. Stay at a stage longer if you do not yet control it.
Stage 1: hanging with adjustable foot support
Try two short holds, for example 10–20 seconds, using as much foot support as needed. End before your grip opens or your shoulders become uncomfortable. Gradually unload your feet. A fixed unassisted hang time is not an entry test for the next stage.
Stage 2: practise the full pull with assistance
Use suitable foot support, an appropriate long loop band or an assisted machine. Start with, for example, three sets of 3–6 calm repetitions and two minutes of rest. Use enough help for the full range and stop while one more controlled repetition would still be possible.
Stage 3: a few controlled negative repetitions
Step into the top position from a suitable support without jumping. Support yourself and lower over roughly 3–5 seconds. One or two sets of 1–3 repetitions are enough as an initial addition; reduce assisted sets accordingly. If you cannot brake the descent, use more help or stay at stage 2. Step down under control after each repetition.
Stage 4: less help and an occasional unassisted attempt
When every assisted set keeps the same grip and range, reduce help by a small step. Change assistance or repetitions one at a time. Occasionally try one unassisted pull-up at the start of a rested session. If it does not happen, continue assisted practice rather than repeatedly failing at the same point.
Record grip, assistance type, repetitions and controlled lowering time. Compare similar setups. If negatives cause strong soreness, reduce volume and wait until you can train with control again. The time needed depends on starting strength, bodyweight, practice and recovery, among other factors.
What a band can do for your first pull-up
A long loop band helps most where it is stretched most. Assistance changes through the movement. A kilogram range therefore does not mean it removes that exact bodyweight at every point. Choose assistance by controlled repetitions rather than colour or bodyweight alone.
Use only a suitable undamaged band according to its instructions and check contact surfaces for sharp edges. Practise entry and exit with secure footing first. A stretched band must not snap back uncontrolled. If you cannot manage the setup, suitable foot-assisted practice is the better learning option.
Compare band types and selection in the resistance-band guide
Resistance Band Set for adjustable assistance
CHF 25.– per set
The set contains three long loop bands with listed resistance ranges of 6–14, 18–32 and 27–45 kg, offering different practice options. None guarantees a fixed amount of pull-up assistance. Before buying, check that the band, bar and entry and exit suit your setup.
View Resistance Band SetOriginal shop photo and verified specifications, without a hands-on product test. Price checked 29.10.2026.
If your first pull-up is not getting closer
You swing or crane your neck: add assistance and pull more calmly. Half a pull with a jutting chin is not yet a controlled full repetition.
Every session consists of failed unassisted attempts: focus on achievable assisted repetitions. Test an unassisted rep occasionally when rested.
You keep adding negatives but feel constantly tired: less volume and more recovery may help more. Extra repetitions count as progress only when you control them.
Frequently Asked Questions
First pull-up: common questions
How long does learning a first pull-up take?
There is no credible fixed number of weeks for everyone. Starting strength, bodyweight, training and recovery vary. Track reduced assistance with the same range rather than a deadline.
Must I hang unassisted for a minute first?
No. A minute is not a requirement. You can practise foot-supported hangs alongside assisted pulling. A controlled grip and comfortable shoulder position matter.
Are negative pull-ups suitable for beginners?
If you can safely reach the top and brake the descent, a few negatives are an option. Start sparingly and reduce other sets. If you drop uncontrolled, add assistance or use an easier variation first.
How often should I train for my first pull-up?
Two separate sessions weekly are an adaptable starting suggestion. Leave at least one rest day between them and account for other back and arm training. Adjust volume and recovery to your response.
Which band do I need for my first pull-up?
A suitable long loop band can help. Choose enough assistance for the full range without momentum. Colour and kilogram range alone do not give a reliable prescription for your bodyweight. Check entry and exit too.
Is an underhand chin-up the same thing?
An underhand chin-up has palms facing you; the overhand pull-up described here has palms facing away. Both are pulling exercises with different feel and loading. Choose a comfortable variation and compare progress using the same grip.
Source and context
Grip, trunk control, pulling without swinging and slow lowering are checked against ACE’s description. Stages, training volumes and progression criteria are our practical adaptable suggestions, not a study-derived guarantee of a first pull-up.
Choose assistance that fits your setup
A suitable bar and achievable repetitions come first. If a band usefully complements your setup, consider the Resistance Band Set. Unsure about space, the bar or band handling? Ask us before ordering.