


Fitness Flohmarkt · Guide
Barbell back squat: set up your rack and learn the technique
Want to learn the barbell back squat? Start with a setup that lets you unrack and rerack under control. This guide covers the free squat with the bar on your upper back: setting the J-hooks, checking the safeties, finding your stance and practising the movement.
In short
Set the bar in the J-hooks just below shoulder height. Adjust the safeties to your controlled bottom position and test with a light bar. Unrack with both feet under the bar, take a few short steps back and squat with a stable trunk. Rerack only when both sides are above the hooks.
1. Set up the rack, J-hooks and safeties
Assemble and, where required, anchor the rack according to its instructions. Clear the training area and route to the hooks. Set both J-hooks to the same height: you should unrack by slightly extending your legs without rising onto your toes. Hooks set too high also make reracking harder.
Set the safeties on both sides just below the lowest bar position in your planned, controlled squat. They should clear normal repetitions while remaining able to catch the bar. Check locking, coverage of the full lifting area and controlled placement onto them with a suitable light bar before loading. A general rack load rating does not separately approve impact loads on its safeties.
2. Position the bar and unrack under control
Grip evenly a little outside shoulder width. Step under and rest the bar on the muscles of your upper back rather than your neck vertebrae. Draw your shoulder blades together and find a stable grip width. Do not force a narrow grip if your shoulders or wrists cannot accommodate it.
Place both feet under the bar, brace and extend your legs to lift it clear. Take a few short steps back into the area above the safeties. Start around shoulder width or slightly wider with toes turned out a little. This is a starting point rather than a fixed measurement or angle.
3. Barbell squat: lower and stand up
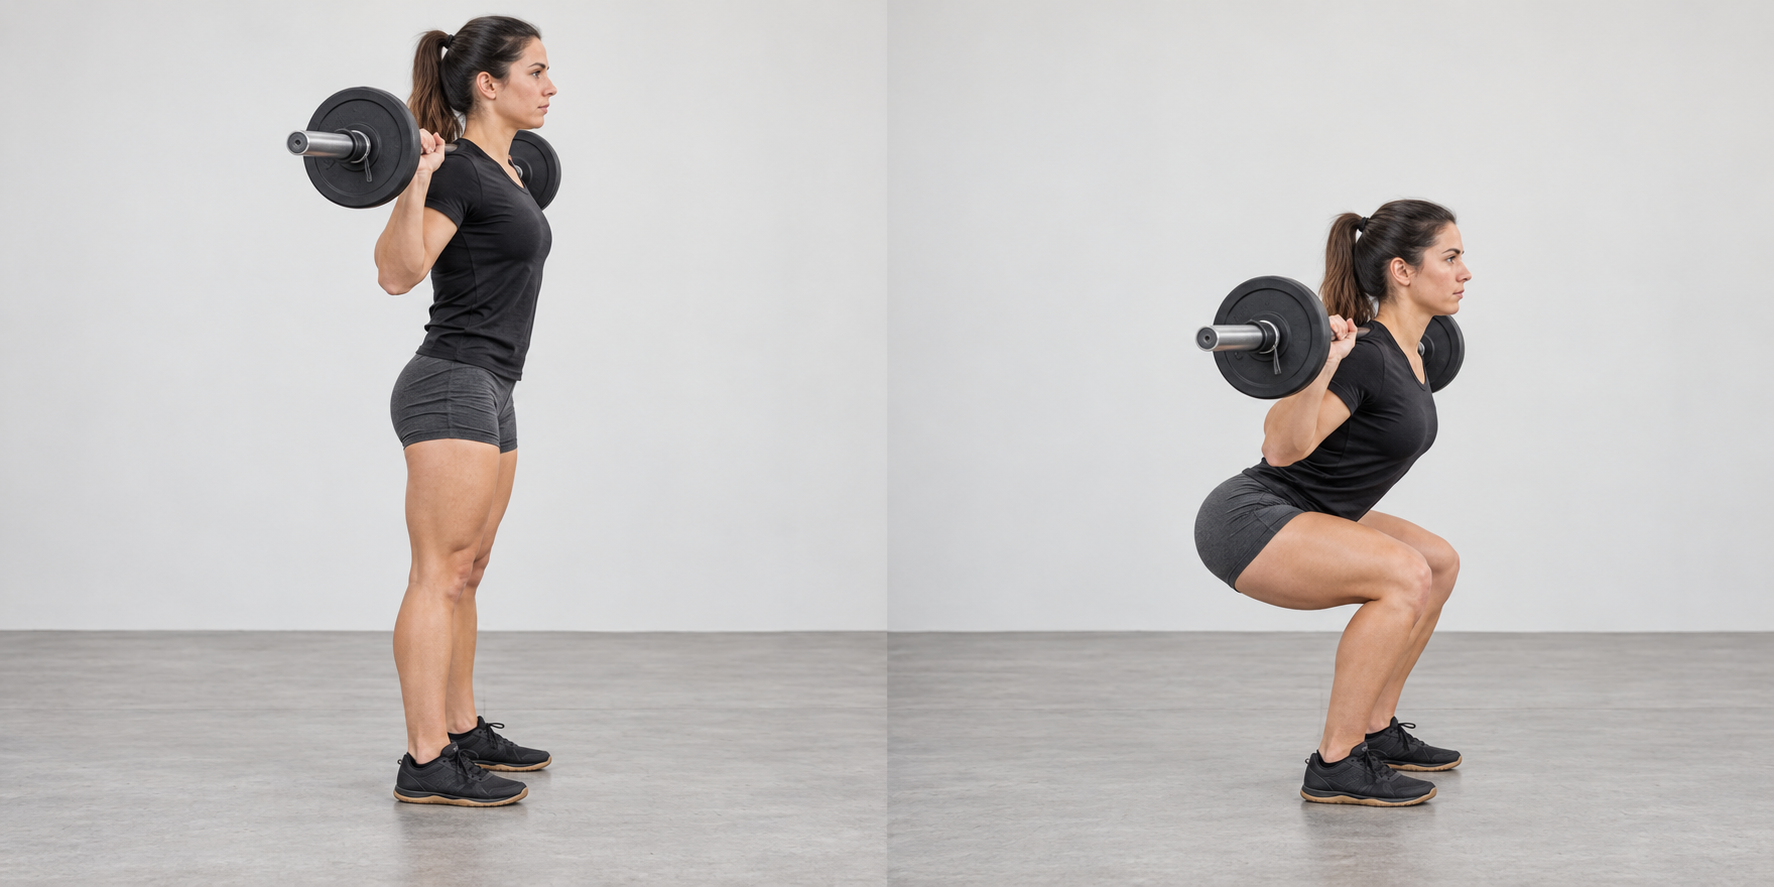
Brace before each repetition. Bend your knees and hips under control while keeping the whole foot loaded. Your knees roughly follow your toes. They may travel forwards; a universal rule against passing the toes does not fit every body proportion. Keep the bar close to vertically above midfoot, allowing your torso to lean forwards as needed.
Initially squat only as deep as you can control your balance and trunk position. Do not force extra depth by lifting your heels or markedly rounding your lower back. Push through the floor and extend knees and hips together to stand. Finish stable without leaning backwards.
After the set, reach both hooks
Walk forwards under control to the uprights. Check that the bar is above both J-hooks before lowering it. Do not search for a hook with only one end. Learn controlled placement onto the safeties with guidance and a light load before attempting demanding sets.
4. Check these back-squat mistakes first
Heels lift: reduce load or depth and check stance and mobility. Keep your whole foot stable on the floor.
Hips shoot up and your torso tips: use a lighter load and practise coordinated knee and hip extension.
The bar hits the safeties on every repetition: check your actual squat depth and adjust both supports rather than hastily changing your movement.
Start with a load you control calmly. Even an empty 20 kg bar may be too heavy. Choose a lighter training bar or practise without a load on your back. Increase only with repeatable technique. Stop if there is pain; when unsure, in-person coaching helps more than another weight increase.
A rack with suitable supports as your starting point

R-SERIES Power Rack
CHF 490.–
J-hooks, safety bars and a pull-up bar are included. The shop lists dimensions of 152 × 133 × 214 cm. Barbell and weights are not included. Allow extra room for loading and your movement; the footprint is not the full training area. Check installation and suitability for your room before ordering.
View R-SERIES Power RackOriginal shop photo and verified specifications, without a hands-on product test. Price checked 28.10.2026. The exercise illustration shows generic equipment rather than a demonstration of this rack.
Compare rack types and space requirementsWhich guide covers each squat variation?
This guide covers the free back squat with the bar on your back. A goblet squat holds weight in front of your chest; a front squat rests the bar on the front of your shoulders. A hack squat uses a different guide or load position again. These variations require different supports and body positions; do not transfer rack settings without checking.
Learn the goblet squat as a starting point · Understand hack-squat variations
Frequently Asked Questions
Barbell back squat: common questions
How high should squat J-hooks be?
Just below shoulder height so you can unrack by slightly extending your legs with both feet beneath the bar. Avoid rising onto your toes or lifting from a deep squat. Set both hooks equally.
Where should back-squat safeties sit?
Just below the lowest bar position in your controlled repetition. They must cover the full lifting area and be locked. Test the movement and controlled placement with a light bar, following manufacturer approvals.
How deep should I squat with a barbell?
When learning, use a depth where you control balance, foot contact and trunk position. Proportions and mobility vary. Do not copy an image by lifting your heels or markedly rounding your lower back.
Can my knees pass my toes in a squat?
Yes, depending on your proportions and squat depth. Keep your foot stable and your knees roughly aligned with your toes. A fixed boundary at the toes is not a universal technique rule.
Do I need a 20 kg bar to learn squats?
No. Even an empty Olympic bar can be too heavy for learning. Use a lighter bar or practise without a load on your back. Control of the full sequence, including unracking and reracking, matters.
How does a back squat differ from a goblet squat?
A back squat rests the bar on your back and uses a suitable rack. A goblet squat holds a kettlebell or dumbbell in front of your chest. Grip, load position and setup differ; our separate guide explains goblet technique.
Squat technique sources
Bar placement and movement sequence were checked against ACE’s exercise guide. The second ACE article discusses individual squat-depth differences. These are learning guidelines rather than an individual technique diagnosis or safety guarantee. Follow the manufacturer instructions for your rack, hooks and safeties as well.
Plan your squat area before ordering
Want to squat with a barbell at home? View the R-SERIES Power Rack or ask us about room height, space, barbell and suitable supports. Send your dimensions and existing equipment so we can clarify product questions before you order.